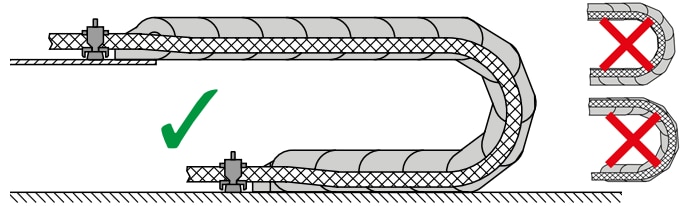
Energy Chain Selection Guide
1. Sizing Energy Chain
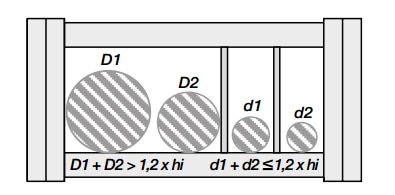
Identify the cables that will be in your chain, get their diameters, and determine how much space they'll need.
Ideally they will be laid next to each other with separators preventing cables crossing over.
Select a chain with inner dimensions large enough to fit the cables.
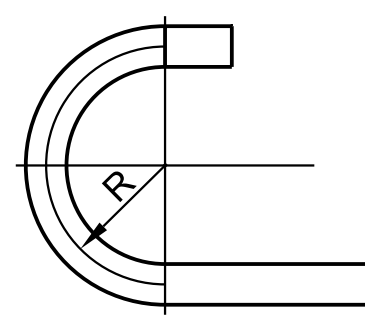
Choose a bending radius that is greater than the largest minimum bending radius required by your cables.
Check the outer dimensions suit your installation space.
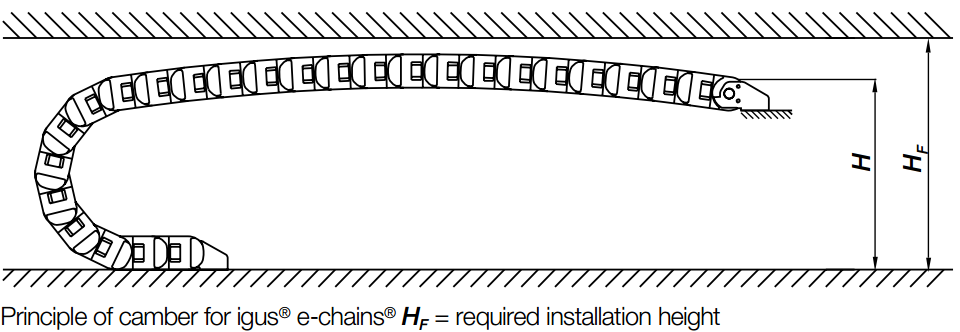
Check the chain width and the overall height of the folded chain including clearance for the camber in the chain.
Ideally the chain should be wide and short to limit toppling moments.
2. Determine Fill Weight
Sum the per metre weights of cables that will be running in the chain.
Check it against the maximum fill weight of the chain.
3. Check Travel Length
Generally the chain will be fixed in the middle of a stroke and move equally forwards and backwards.
The total distance the moving end moves is the travel.
In a self-supporting chain, the unsupported length will be half the travel.
Using the travel length, the fill weight and the graph provided determine if the chain is within in the FLG or FLB section (below the line).
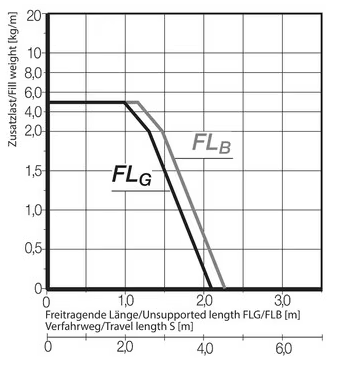
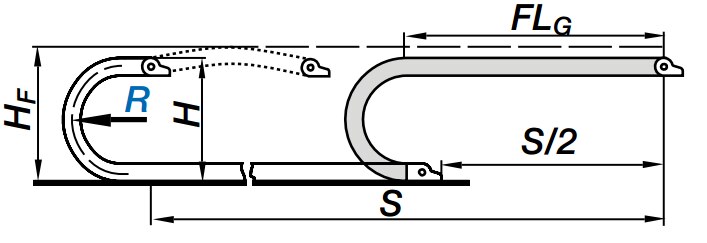
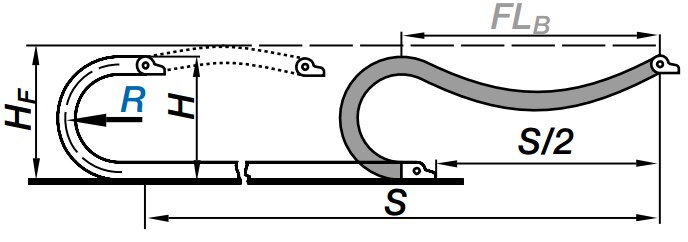
If above both lines select a larger chain, or contact us about a long travel.
4. Calculate Chain Length
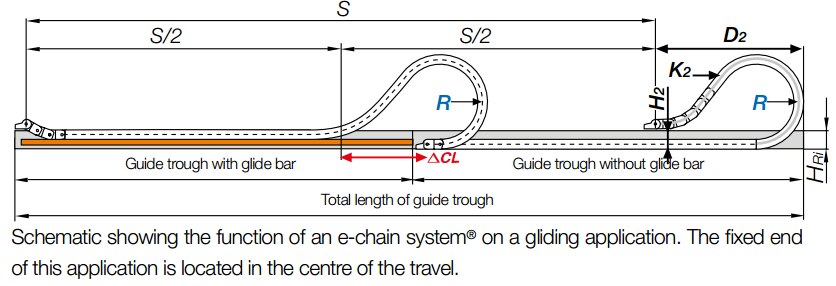
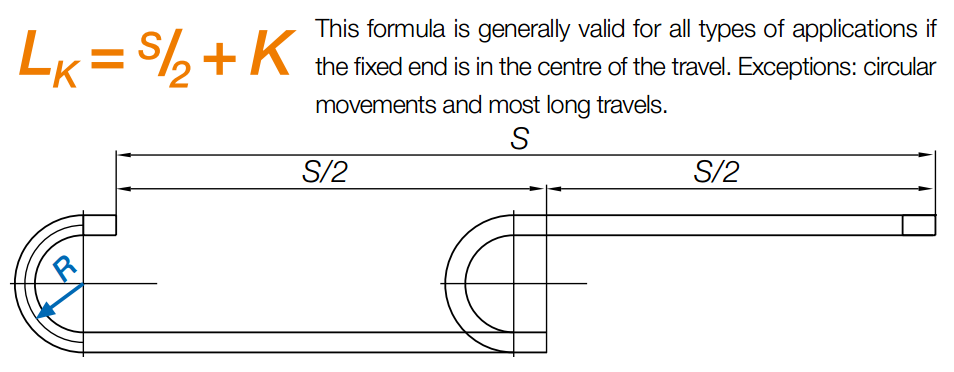
For an unsupported application, the minimum chain length will be half the travel (S/2) plus the chain used up in the bend (K).
You can add more chain to offset the fixed end, but this chain will not move.
5. Choose Opening Principle
Most chains have an option to open on the inside or outside of the bend.
As access to the cables is easier, for unsupported travels it is best to have the chain open on the inside.
This is usually designated by an 'i' in the part number eg E2i.26.
For long travels where the upper run of the chain glides on the lower run, it is best to have the chain open on the outside of the bend.
6. Interior Separation
Arrange your cables in the chain, balancing the weight if possible.
Use the online tools to drag and drop cables and separators for complex designs.
Add separators between cables that could move past each other.
Depending on the pitch of the chain, the size of the cables and duty of the application decide on the frequency of the separators.
Eg you might place them on every second link only.
7. Select a Bracket
Complete the chain by choosing a bracket to mount it with. Brackets are sold as pairs, so you'll need only 1 bracket set per chain.
Add in tiewrap combs or chainfix clamps to secure the cables in a neutral position at each end of the chain, ie not pulled tight.